Guide for candidates to have a positive experience taking an Interview on Coderbyte
Joining an Interview
Upon clicking the link shared with you for an Interview, you will enter the Interview lobby.

If you are expected to use Coderbyte's video and audio capabilities, click Turn on webcam. Make sure any ad-blocker extensions are disabled so the Interview functions properly.
Once you are ready, click Join the interview.
Navigating an interview
There are four experiences you might see while taking an interview:
- Coderbyte's default code editor
- Whiteboard powered by Miro
- Spreadsheet powered by Google
- Jupyter Notebook with options for R, Python, and Scala
- VS Code Editor
Coderbyte's default code editor
When coding in Coderbyte's default editor, the Interview screen is split into four sections:
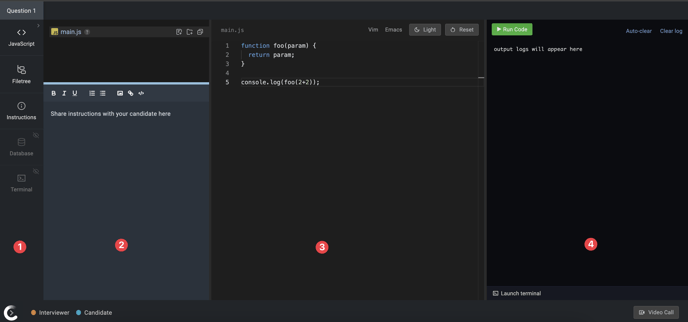
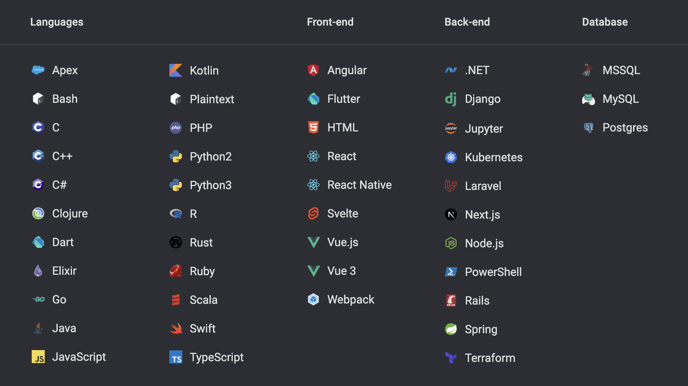
- The toolbar lets you change languages, view and hide the filetree and/or instructions, and enable a database and/or terminal. The following languages are available:
- The filetree and instructions indicate what prompt you have been given by the interviewer. You can add, remove, and duplicate files. You can also type notes into the instructions textbox.
- The editor for writing your code. You can toggle light/dark mode, enable Vim or Emacs, and have access to auto-complete. The editor is collaborative so multiple people can type simultaneously.
- The output logs and optional terminal to run your code.
Note: If you get disconnected from the server, or your updates are not syncing properly, try reloading the page.