Categorize Assessments, Interviews, and email notifications with Workspaces
How to create Workspaces and subscribe admins to email notifications
Workspaces allow you to do the following:
- Easily organize your assessments, interviews, and projects
- Subscribe admins to email notifications
- Enable permissions and separate teams within your organization
Enabling Workspaces
To use Workspace, navigate to Users & Workspaces and then click the link that says Click here to activate your Workspaces.

Adding Assessment and Interviews to Workspaces
By default, your Assessments and Interviews will be uncategorized and only the assigned manager of the assessment will get email notifications. To add an Assessment into a Workspace, click edit and you will see the options below:

You can then easily filter and search for Assessments in specific Workspaces. The process is similar for assigning Interviews to a Workspace.
Subscribing Users to email notifications
When you add Users to a Workspace, all of them will be notified via email when a candidate submits an Assessment within that Workspace, unless the Assessment is set to anonymize candidate information.

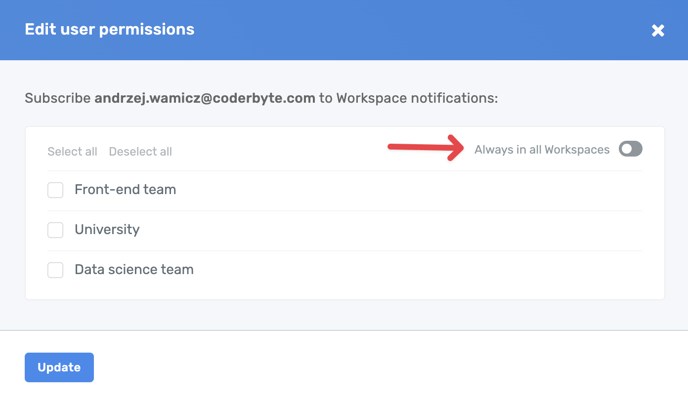
You can also add a User to all current and future Workspaces by clicking the pencil icon next to the corresponding User's Workspaces, opening the modal, and toggling the corresponding setting:

Private Workspaces
If you enable the Private Workspaces feature, this sets strict permissions across your account so that Users can only view the contents of the Workspaces they are in. If this feature is enabled, then only Owners are able to edit Workspaces for Assessments and Users.
